Product Inbound Plan is to submit inbound plans to the warehouse before the products are delivered. The inbound order data must match the shipment data, and make sure the SKU is created on the Products page before creating the inbound order.
1. Log in to the OMS account
Log in:https://seller.shipa2z.com/login
2. Manually Create an Inbound Order
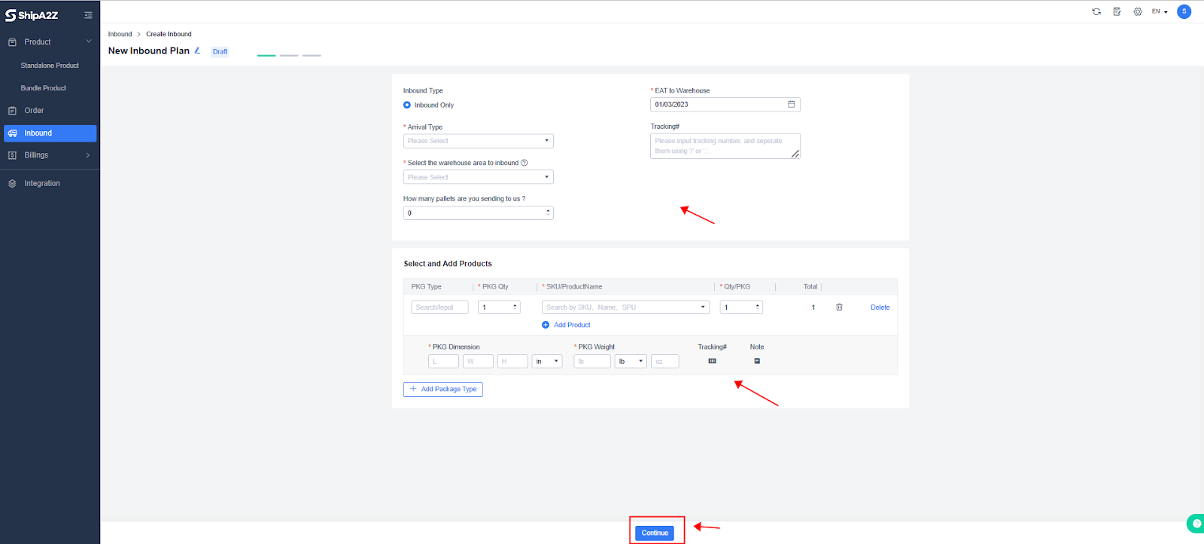
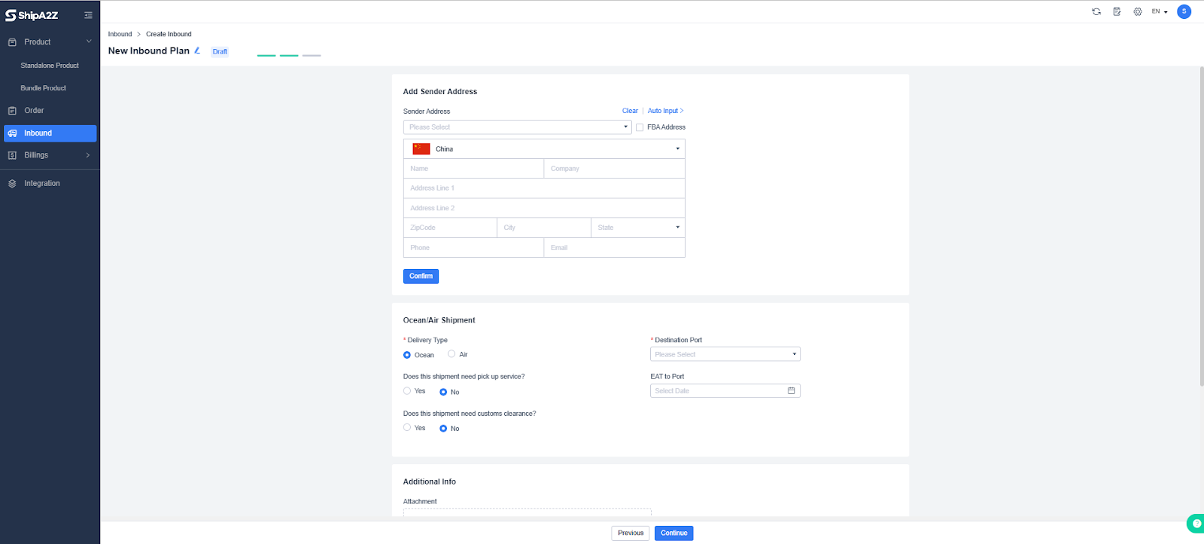
Inbound > Create Inbound-> Fill in the information according to the prompt -> Continue >Fill in the shipper information -> Preview the information and estimated cost > Submit
Arrival Type: Refers to the packing type. Generally, there are boxes, pallets, and different sizes of containers. It can facilitate the warehouse to set charges according to different arrival types.
Select the warehouse area to inbound: You need to confirm the inbound warehouse area with us in advance.
How many pallets are you sending to us ?: It is required when selecting the arrival type as pallet.
EAT to Warehouse: Required, the estimated time of arrival.
Tracking#: Estimating the arrival time and confirming the single number is convenient. Multiple tracking numbers must be filled and separated with comma intervals when there are multiple parcels.
PKG Dimension: The same PKG Dimension means the same SKU and qty. If there are multiple types of boxes in an inbound order, you can add the PKG Dimension and define the quantity of box type and the SKU and quantity in it. It supports adding tracking numbers for different boxes.
Add sender address: Fill in the sender address. The shared address can be set in the Setting-Address Book in advance.
Ocean/Air Shipment: If the headway is shipped from a non-U.S. area, you need to fill in the headway information, including the delivery type, destination port, etc. The warehouse can make arrangements for space and manpower according to the shipment information.
Additional Info: The attachment file of the inbound plan can be added.


